*** ***
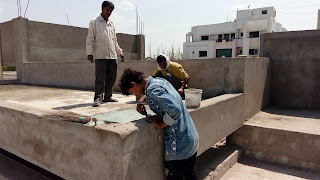
Before we proceed, I would like to clarify that waterproofing depends on both the material and the way you apply it. I will divide this topic into two-part. In the first part, we will cover how to make the structure itself waterproof and in the second part, we will cover the coating layer or superficial work.
Part 1:- To make the structure itself waterproof we have to make the concrete structure dense, so we have to take care while making the concrete mix. The water-cement ratio should be proper. The admixture should be in proper quantity, I suggest SP 5000 of Facroc ( 4 kg / per m3), this Precaution to be taken before while making concrete, similarly at the time on creating proper vibrator should be used, it is always good to use the proper amount of vibration not to less and not too more. If we are casting top roof slab then proper slope should be maintained, if water will not stay it won't leak.
What is after taking full care and still could leakages?:- It's normal, as many chemical activities going on at the time of concreting, and many factors depend on shrinkage leakage, like water, sand, climate, and so on. But don't worry, the last option is to do pressure grouting. Pressure grouting is also a big topic. You can drill and fix the outing pipe and with chemicals, you can do pressure grouting and fill the gaps, so there will be no leakages.
Part 2:- now part 2 and 10 best products for waterproofing
1) Dr. Fixit Damp Gaurd. also, It is a very simple and powerful product.
Mixing Ratio: Mix all Base, Hardener & Water in an equal ratio by weight
Pot life at 30OC, Minutes - 40 minimum
Surface drying time at 30℃, hrs - 1-5 hrs.
Intercoat periods, at 30℃, hrs - 6-8.
SHELF LIFE: Shelf life is 12 months from the date of manufacturing if stored in original and unopened packaging in a cool dry place away from direct sunlight.
Included_Components: Dr. Fixit Dampguard, 500 Gm.
2) Dr. Fixit Powercrete. Method of Application
1. For waterproofing Surface preparation }
Prior to the application of Dr. Fixit Powercrete, ensure to clean the substrate which should be free from all the dust, foreign particles, loose aggregate, oil grease, etc. This can be done with the help of scarifying, grinding, water jetting and sandblasting, etc.
The surface should be wetted, well prior to application, thoroughly with water to get SSD condition. }
All the depression or pinholes /potholes to be repaired using Dr. Fixit Powercrete modified mortar in a mixing ratio of ( 1 kg cement: 1.50 kg silica sand: 0.50 kg of Dr. Fixit Powercrete )
Coating application
Mix Cement with Dr. Fixit Powercrete in the ratio of 1: 0.50 ( 1 kg cement OPC53: 0.50 Dr. Fixit Powercrete ) by weight.
The mix should be stirred thoroughly until a smooth homogeneous paste is obtained.
Apply the first coat over the SSD/wet condition substrate.
Apply and unroll woven glass fiber cloth evenly on the wet coating before it dries out on larger areas.
Using a nylon brush, apply one coat of Dr. Fixit Powercrete coating over the glass fabric so as to cover the fabric, allow 5-6 hours of air drying before application of another coat of Dr. Fixit Powercrete slurry coating over the surface.
Provide polymer-modified protective plaster of 15-20 mm thick over the coating to ensure safety from mechanical damage. Curing } Allow Dr. Fixit Powercrete coating to air cure for 3-6 hours after the final coat.
Do not allow the rapid drying of the coating by covering the coating with help of a polythene sheet in case of high humidity and windy condition.
However, moist curing after the air-drying is advisable.
Following the moist curing, Dr. Fixit Powercrete coating shall be allowed to be air-cured for 3 days before submerging it in water.
This season does not forget to make hollers, to make the structure waterproof.
What is Holler:- Holler is the inclined structure to covers the corner between the wall and flooring. It's of two shapes, tringle or quarter circle.
*** ***
We can use Holler: Mainly holler is used in water tanks, Warehouses, Sheet and wall joints, and parapet walls. Holler is used where there are leakages between horizontal and vertical joints and where to make cleanliness.
How to make Hollers:- It is essential to follow the following steps while making hollers, as it covers the joint.
Step 1:- Clean the area properly, No dust particles should be available, Remove the loose material, clean it with a paintbrush, and now clean it with portable water.


4 Comments
Hello” i can see that you are a really great blogger. Source
ReplyDeletesd
ReplyDeleteAwesome post you have here, thank you for sharing this ideas! https://www.cjcrawlspace.com/
ReplyDeleteAwesome post you have here, thank you for sharing.
ReplyDeletePlease click on follower button